> HTML source: [Save Annotated Screenshots on Mac: TeachingInk Pro Guide | Haloa](https://haloa.cc/guides/teachingink/annotated-screenshots/)
> Page language: en
[TeachingInk](https://haloa.cc/apps/teachingink/)[Support](https://haloa.cc/apps/teachingink/support/)
# How to save a screenshot with your annotations
Finish your ordinary pen annotations, then choose a full-screen or selected-area screenshot with TeachingInk Pro. Save the image, or copy and paste it into an app that accepts images.
Applies to the released version TeachingInk 1.3.0 · macOS 14.0+
Information checked 2026-10-24
## Before you start
**Tools and access:**Save or copy screenshots · Pro
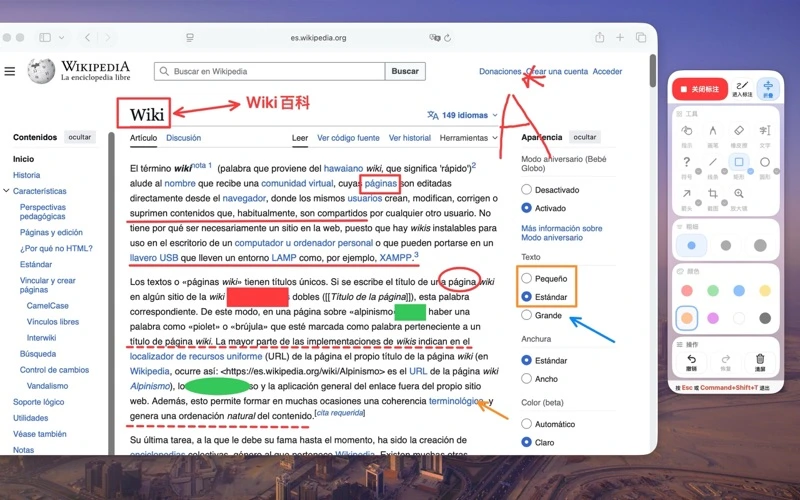
Real interface overview from an earlier version; the exact build is unknown. This illustrates annotation over a webpage, not every step in this guide.
1. ## Check the ordinary marks you want to keep
Keep the webpage, slides or board visible and finish your marks with the regular pen. A screenshot is a still image, not a recording. Do not rely on the previewed temporary laser strokes for content you want to preserve.
2. ## Check Pro and screen recording permission
Screenshot export requires Pro. When macOS asks to read screen pixels, grant TeachingInk screen recording permission, or check System Settings → Privacy & Security. This permission supports screenshots and the magnifier; ordinary pen writing does not require granting it for that reason.
3. ## Choose full-screen or selected-area capture
Choose a full-screen or selected-area screenshot and confirm the area to keep. Include the intended content and ordinary annotations. Check for private information or notifications before exporting.
4. ## Save or copy, then inspect the image
Save to a folder, or copy the screenshot and paste into an app that accepts images. Open the final image to check it before sharing. If saving fails, check access to the destination folder; if the underlying screen image is missing, check screen recording permission.
## Questions for this task
### Why can I draw but not save a screenshot?
The basic pen and screenshot export have different access requirements. Capture needs Pro and permission to read screen pixels; saving a file can also depend on access to the destination folder. Check purchase access and system permission separately.
### Does screenshot export record my presentation?
No. It saves a still image, not a video. Take separate screenshots at the moments you want to keep.
### Will the previewed laser strokes be exported?
The previewed laser is a temporary pointer. Its strokes are not exported as ordinary annotations in screenshots. Use the regular pen for marks you want in the saved image.
Open the saved image before sharing it. If you need help, provide your app version, macOS version, capture mode and what happened; do not send passwords or complete purchase receipts.
## Use TeachingInk on your Mac
Draw over other apps with the Mac app. The App Store shows availability and purchase terms for your region.
[](https://apps.apple.com/app/id6761326660?mt=12)
[TeachingInk product page ↗](https://haloa.cc/apps/teachingink/)[All support topics ↗](https://haloa.cc/apps/teachingink/support/)[Privacy policy ↗](https://haloa.cc/apps/teachingink/privacy/)
## Continue learning
- [How to draw on your Mac screen and circle a point ↗](https://haloa.cc/guides/teachingink/draw-on-screen/)
- [How to use a whiteboard or blackboard on your Mac ↗](https://haloa.cc/guides/teachingink/whiteboard-blackboard/)
[Documentation index](https://haloa.cc/llms.txt)